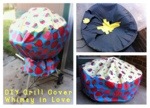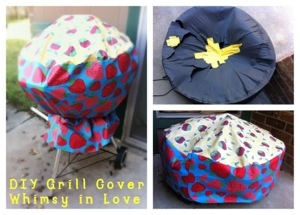
We have a grill and a fire pit, both really great gifts we love to use, but still, both sit unused a lot of the time…very visibly from our windows that look in our back porch and when we play in the back yard. So, my to-do list has included recovering them for a long time. The thing is, they come with their own covers to protect from the weather, but they are boring grey and black and have not weathered the weather so well…however, buying cute cheesecloth for my project never seemed to happen…then, I had a cheap plastic, indoor/outdoor tablecloth that I used to protect my table from crafts at a baby shower that included a hot glue gun…instead of throwing away the old tablecloth that had some small holes and hot glue spots, I thought it would be the perfect fabric for a grill cover, and it already had some hems!
One cover can be made from just two pieces of tablecloth fabric: a circle and a rectangle…

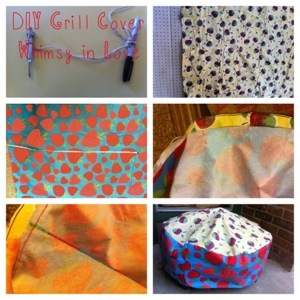
1. Measure the distance across the top of current cover, the diameter (if measuring actual grill/firepit instead of cover, add 1 inch) and measure height from floor to top, or from base to circle top of cover
2. Cut circle by first drawing it by attaching marker to a screwdriver by a string that is half of the decided diameter (radius of desired circle)…if your tablecloth fabric doesn’t allow you to fit a whole circle, just cut two half circles, but add an inch to the flat side of one so you can see the two pieces together with some overlap
3. Cut rectangle that is the height of measured height (plus 1 inch for hem) and the length is 3.14 multiplied by diameter of desired circle(measurement plus one inch for hem) mine was around 95 inches long (3.14*27 for the grill by 29 inches high, 3.14*32 for the firepit by 11 inches high)
Use the hemmed edges as much as possible, if you can’t get the entire length in one piece, just add an inch to one of the pieces for overlap
4. Pin the rectangle around the edge of the circle, right sides together, pinning edge of rectangle about half an inch or so from outer edge of circle (see pic in middle right), this allows circle piece to flow down and make where the pieces meet a more waterproofed seam, allow sides of rectangle to overlap for full coverage
If you get to the end of your rectangle piece and haven’t overlapped full circle, just cut some more rectangle and pin on, with overlap.
5. Sew in place (side rectangle to circle top, I used a zig-zag stitch but that’s just me) and sew a straight line for where the sides of rectangle overlap
6. Now flip the cover right side out and place on grill!
